Adding DNS records and templates
Last Updated: September 21, 2023
Sometimes, adding DNS records can be confusing, especially with so many options for using your domain name out there. To make the process a little easier, we’ve added a few pre-made DNS templates. In addition to finding templates for all of your Name.com products, you’ll also see templates for popular website builders and email providers, including Bandcamp, Bit.ly, Bl.ink, Blogger, Clkim, GitHub Pages, G Suite, Houzz, LaunchRock, Medium, Office 365, Parllay, RebelMouse, Rebrandly, Shopify, Spacecraft, Squarespace, Tumblr, Weebly, WordPress.com, XPRS and all of our Name.com products.
To add a DNS template, follow these steps:
- Log in to your Name.com account.
-
Click on the MY DOMAINS link, located on the top right of the navigation.
- Click the domain name you want to add the DNS records to.
- Click Manage DNS Records.
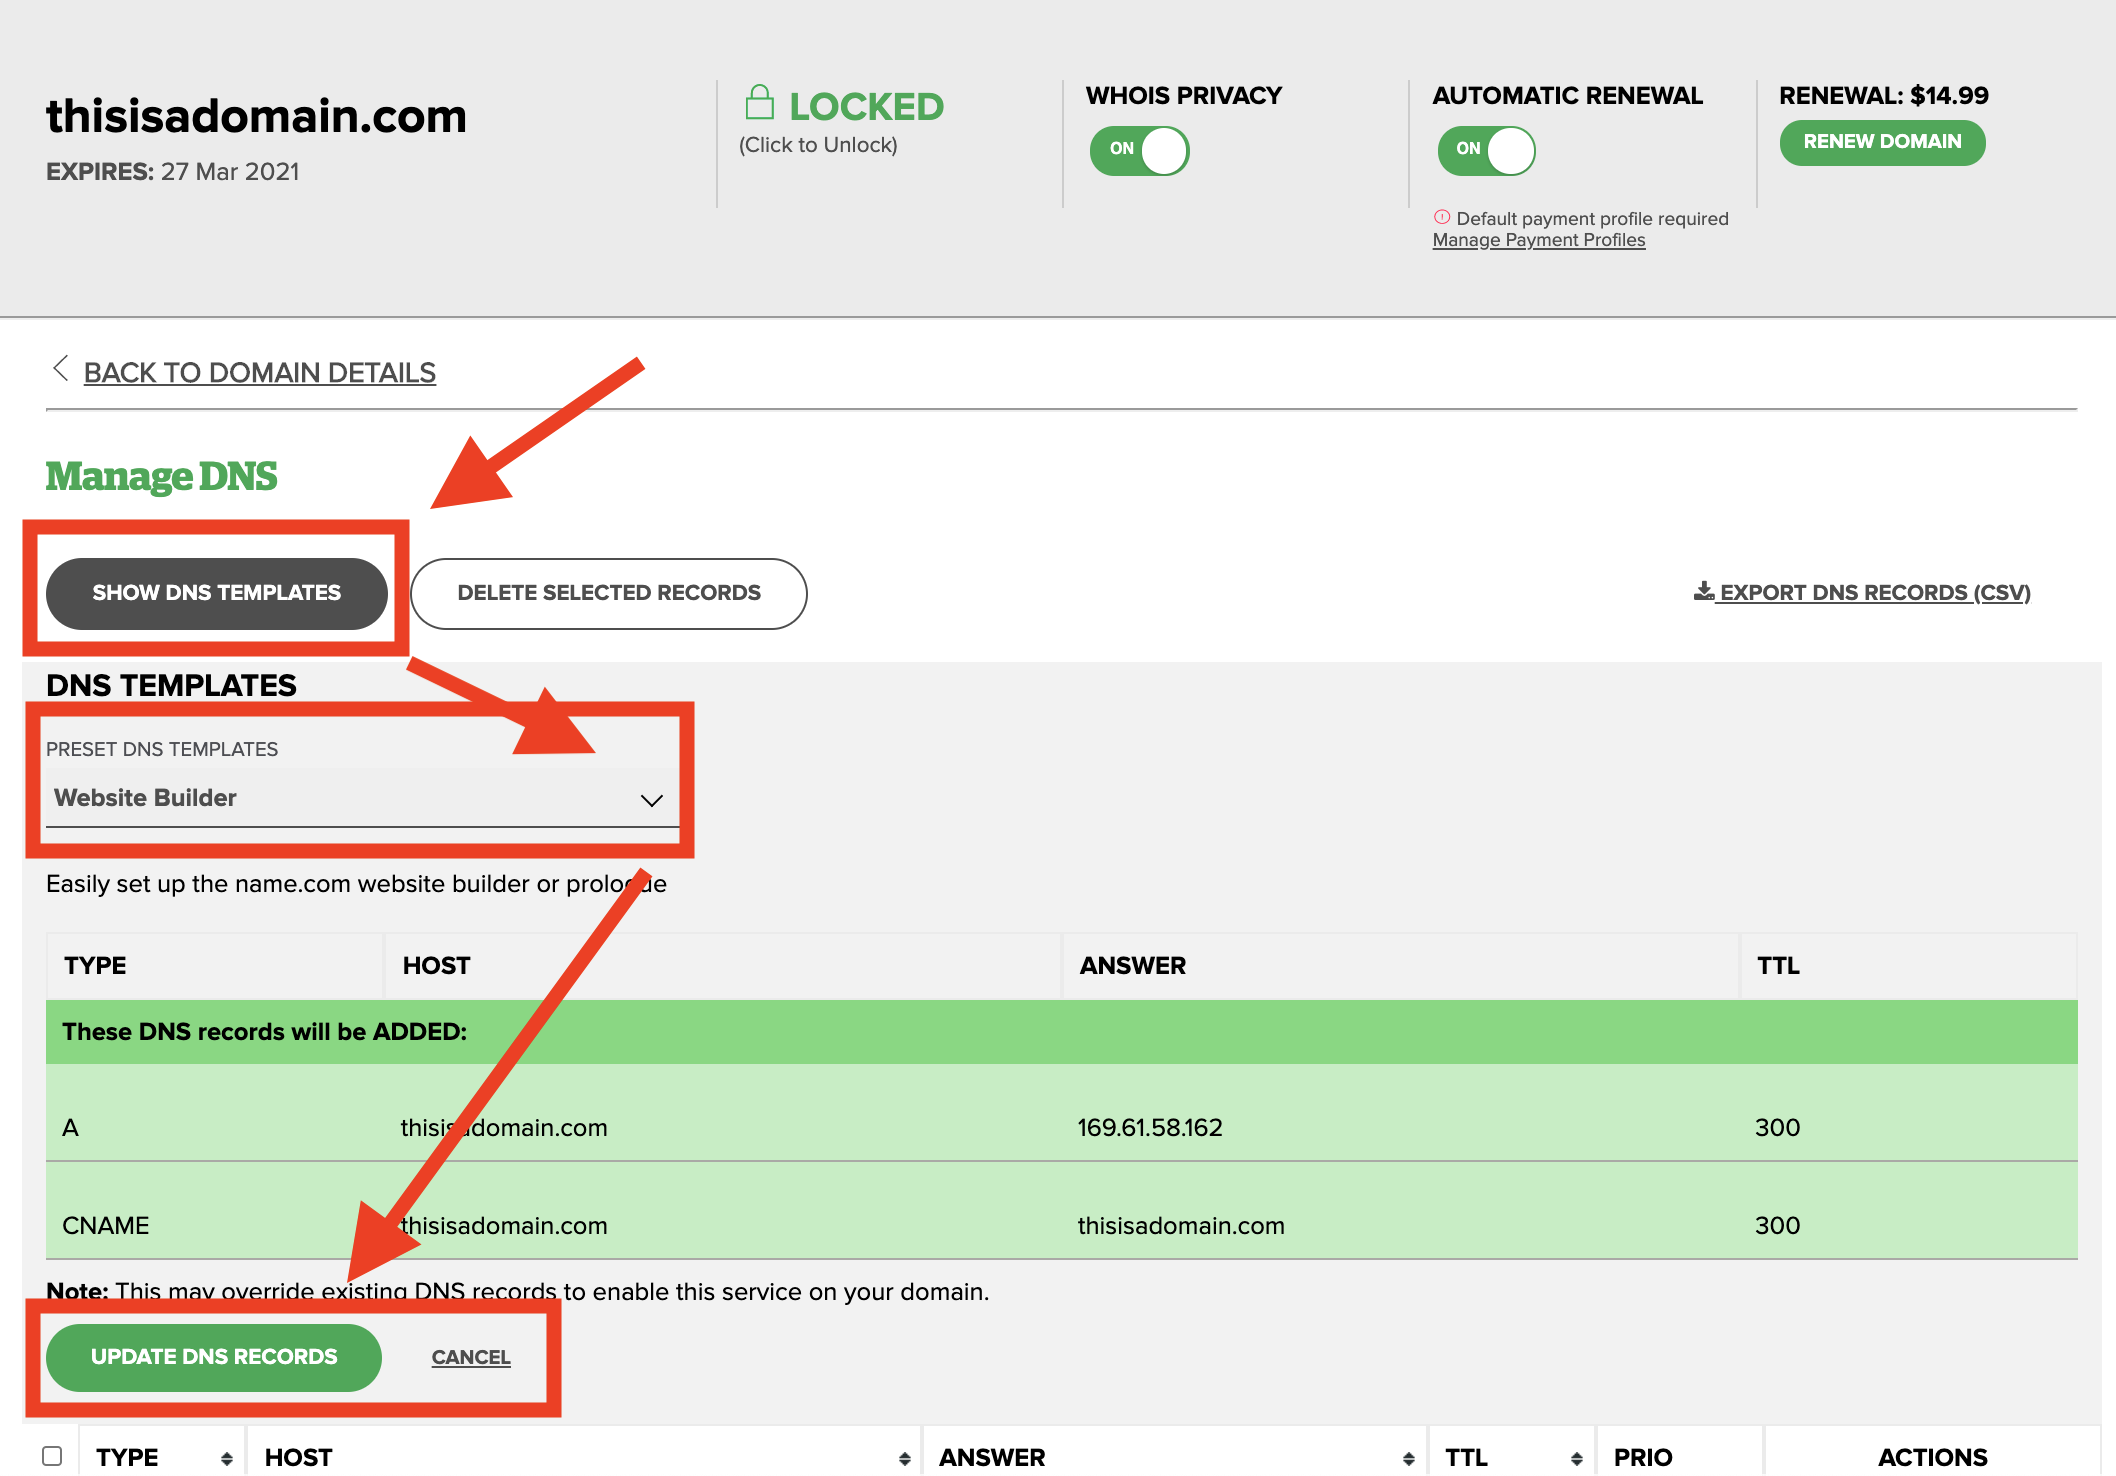
- Click the Show DNS Templates button.
- Select the template you want from the drop-down menu that appears and click Update DNS records.

Note: Some templates will ask you to enter some extra information, like the subdomain or verification key. You will need to get this information from your hosting or email provider. If you would like more templates added, reach out to support with your request.
If you get an error on the DNS Management page that says WARNING!, this means that you are not currently using Name.com’s nameservers. If you are not using Name.com's nameservers then you cannot successfully use our DNS records, and so our DNS templates won’t work. Please click Update Nameservers to use our nameservers, then follow the instructions at Using Name.com's default nameservers.

