Pointing a domain to Name.com Hosting
Last Updated: July 14, 2022
When you purchase a hosting plan through us, our system will automatically add the correct hosting DNS records. But if you're adding an existing domain name to hosting, you will need to add the records manually. To add the records, follow these steps:
How to point a domain to your hosting plan
- Log in to your Name.com account.
- Click the My Products link.
- Click on the link for your hosting account, located under the Hosting section.
- Scroll to the drop-down menu under DNS Management.
- Select the correct domain name in the Currently Managing drop-down menu.
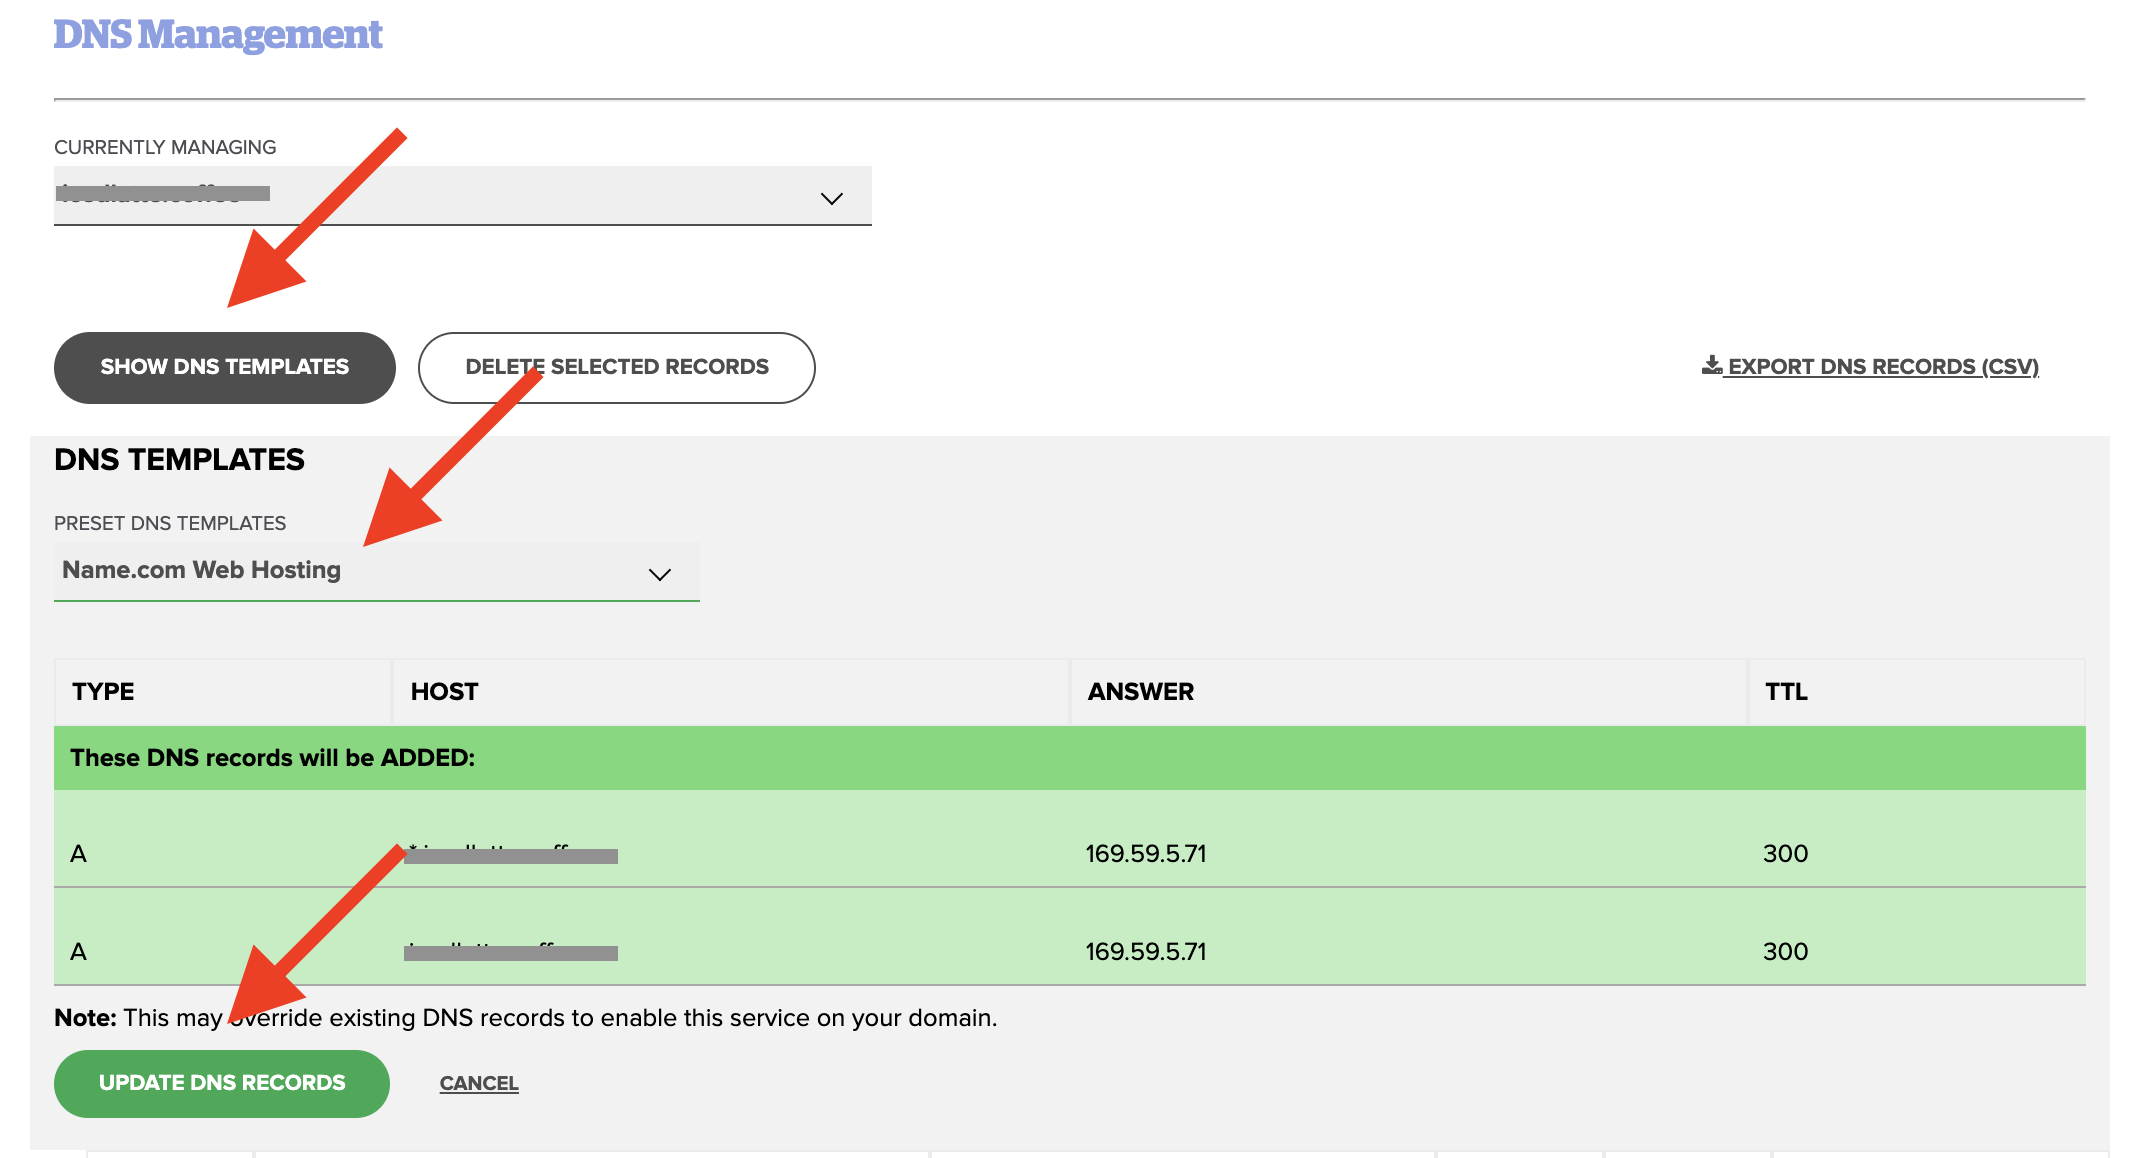
- Click the DNS Templates button.
- Select Name.com Web Hosting from the drop-down menu that appears and then click Update DNS Records. See the image below:
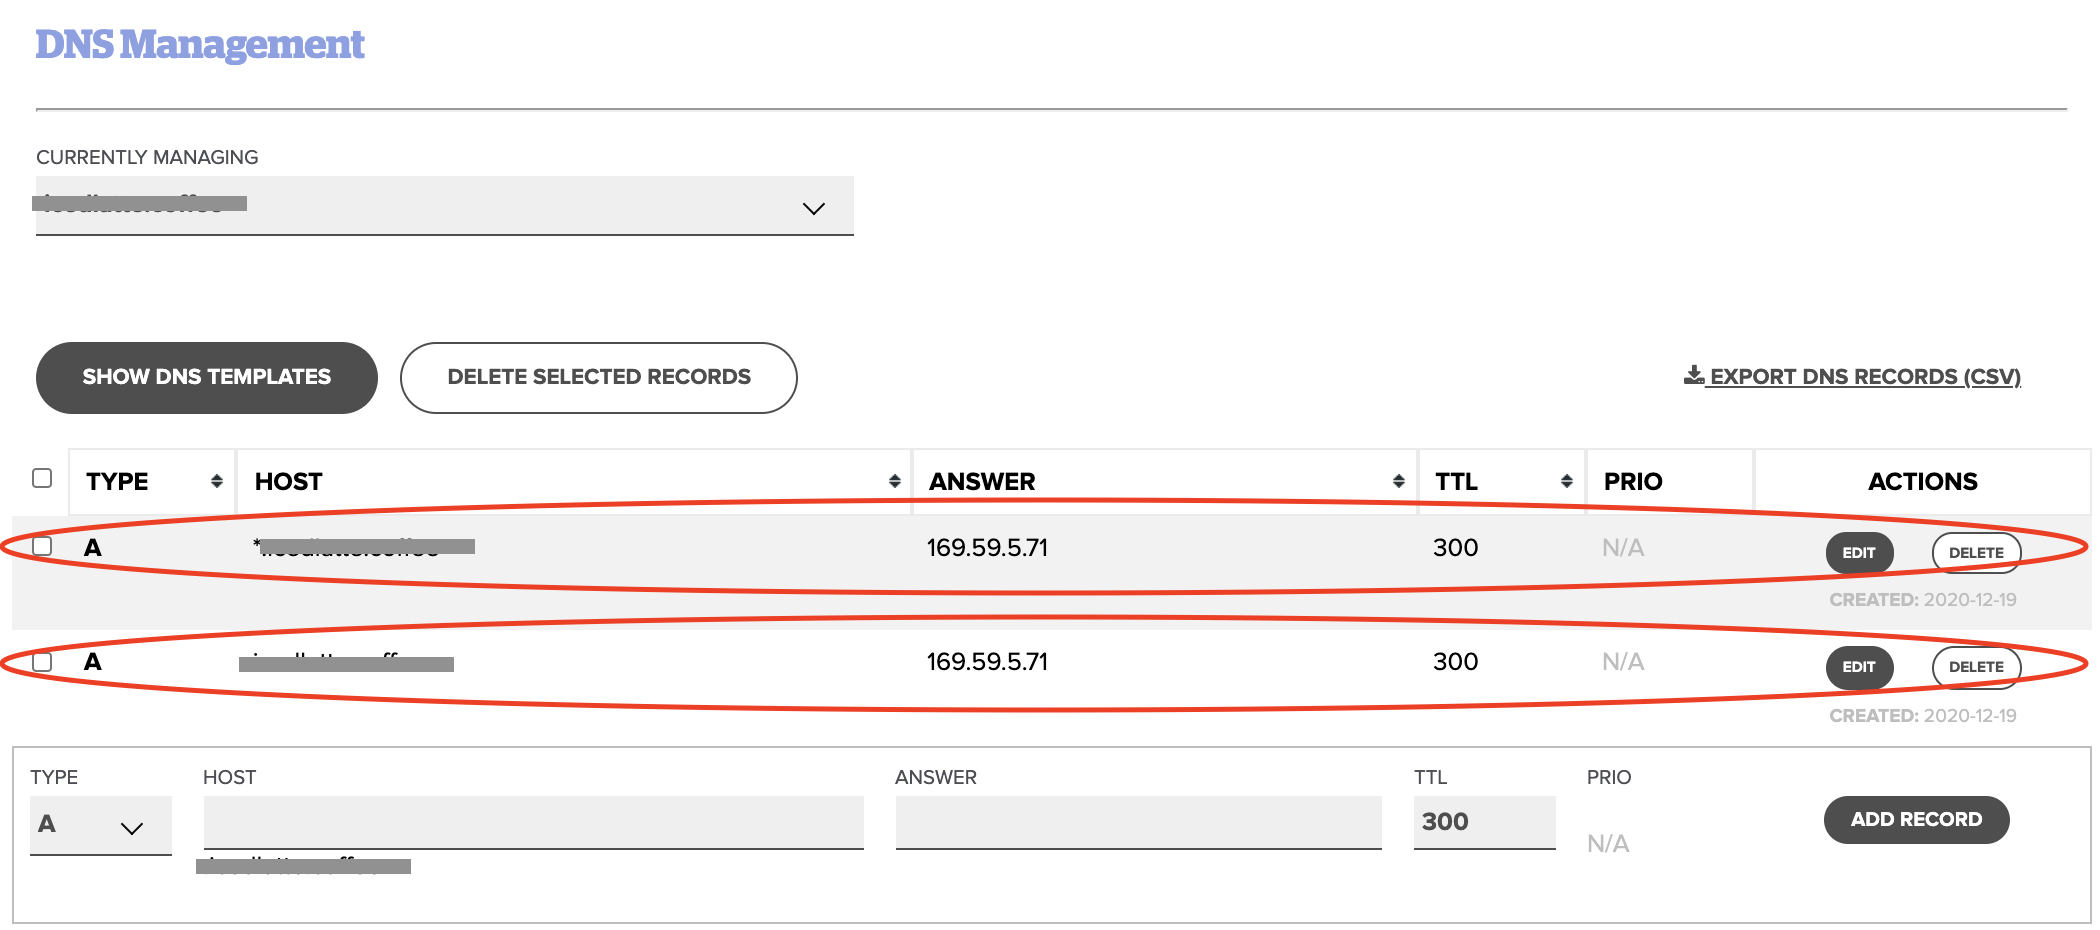
- You will now see two new A records that point to your Hosting Server IP Address. See the image below:
If your domain is owned elsewhere and you wish to utilize Name.com's Webhosting dashboard to manage your DNS records
With your current registrar, you will update your Nameservers to allow name.com to manage your DNS records.
ns1.name.com
ns2.name.com
ns3.name.com
ns4.name.com
If your domain does not use Name.com Nameservers
If the domain name is not registered at Name.com, and you are not using Name.com Nameservers (Like ns1.name.com, ns2.name.com etc) you can follow the below steps:
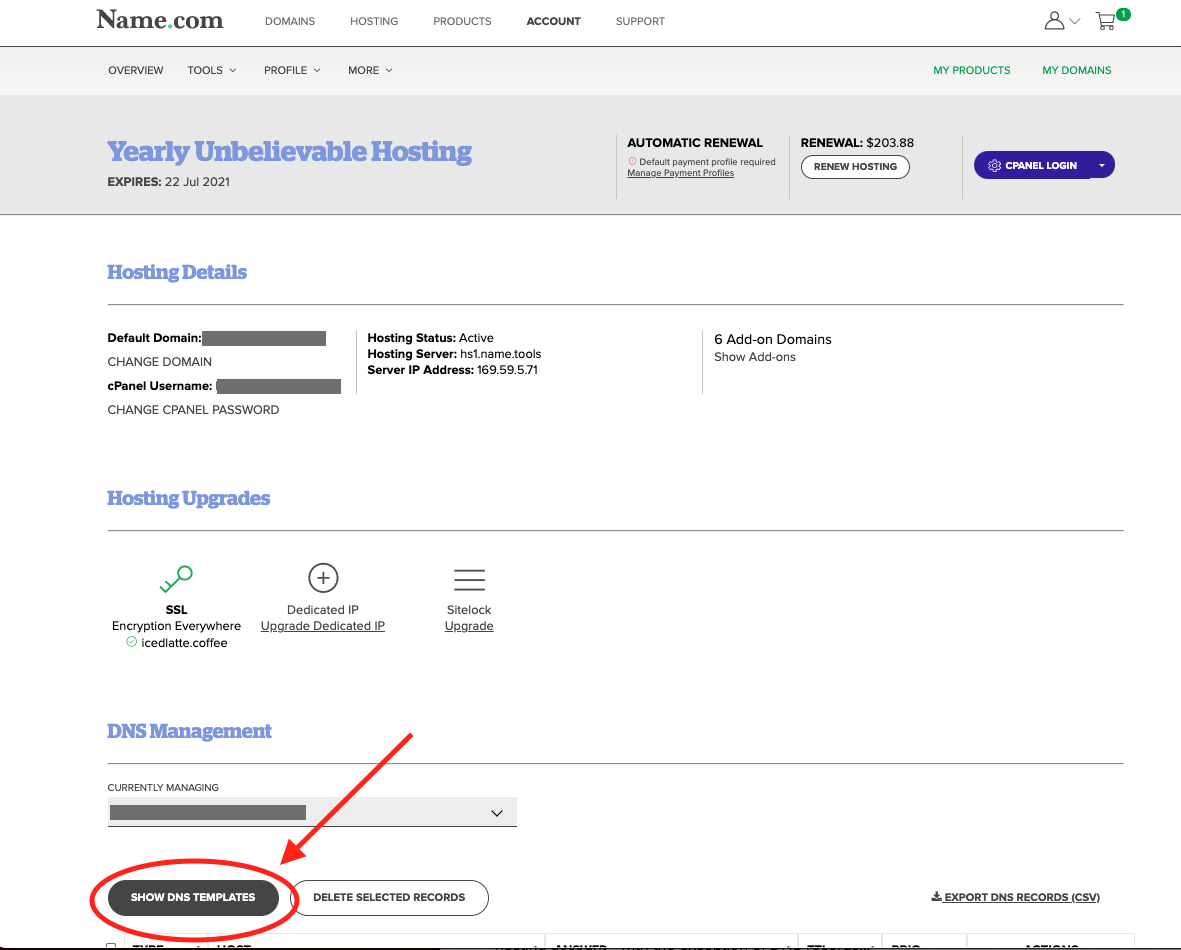
- If you are using your Name.com hosting plan and your nameservers pointing somewhere else, you will need to manually update your DNS records with your nameserver provider. You will need to add Hosting DNS records in your Name.com Hosting product, see the red circle highlight below:
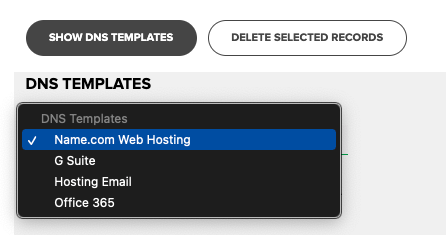
- Click Show DNS Templates and selelct the DNS template like Name.com Email or Name.com Hosting and then click Update DNS Records.
- Your DNS records should look similiar to the below screenshot after you click Update DNS Records.
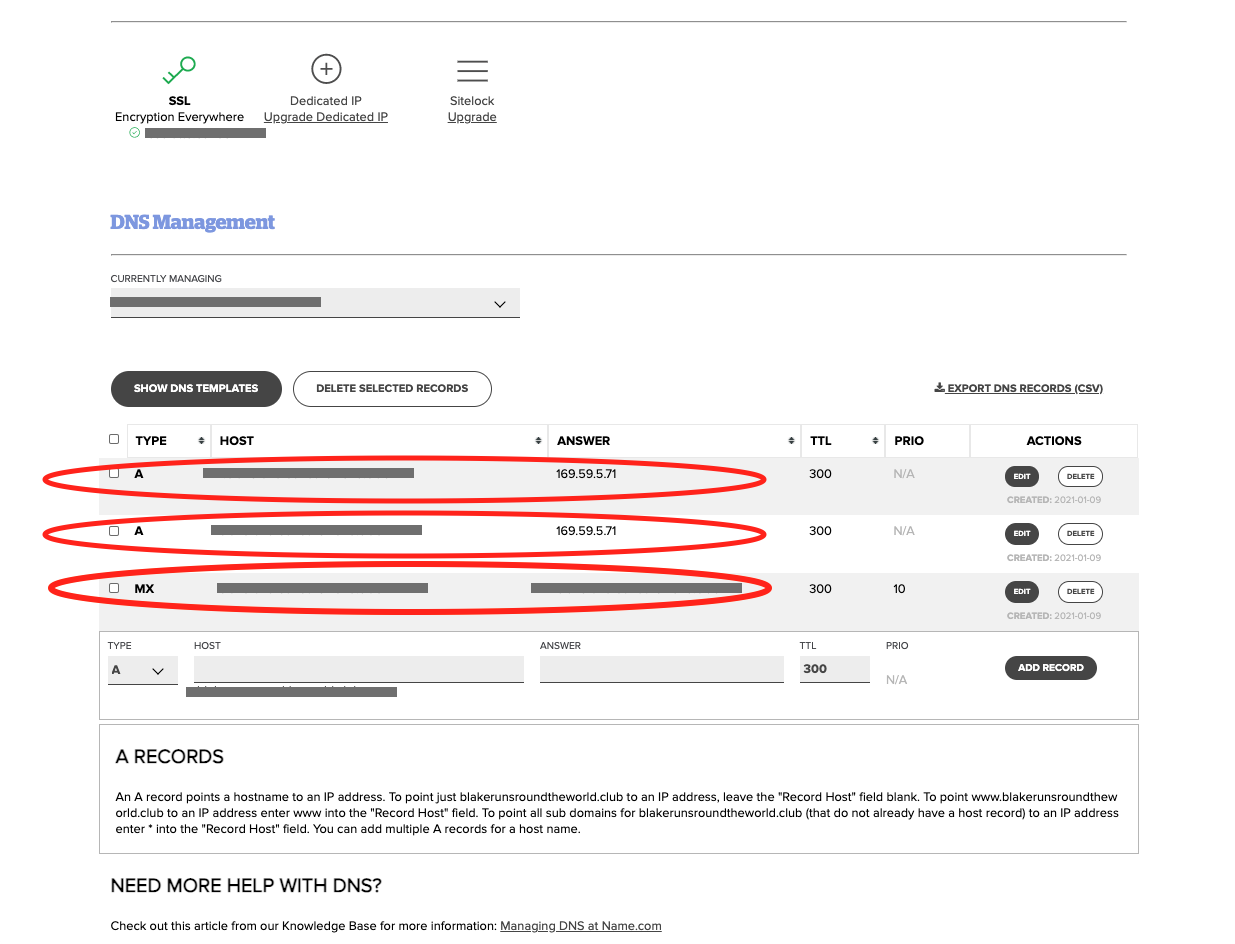
- Add these DNS records that were added from the Show DNS Template to your domain where your Nameservers are pointing.
Note: If you add a domain name to your hosting plan but it does not appear in the Currently managing drop-down, it is registered in another Name.com account. You will either need to move the domain name to the same account as hosting or add the hosting DNS template through the Name.com account it is registered on.
Note: IF you are using the hosting product for email only, check out Pointing a domain to Name.com Hosting.

